Post 14 - The Mage Run
*The contents below are my own opinions and not that of my employer*
Character Model by: Nikola Milievi
Character Rigging by: Kiel Figgins
Character Animation by: Kurtis Paddock
Believing in the Process
There are a lot of ways to animate a motion. That’s one of the struggles I have with the craft. What’s the strongest, and easiest, way to animate this? Do I go big, exaggerated actions? Or small, subtle actions? In this case, we’re going to talk about some of the methodology behind this Mage run cycle.
I feel I can never do enough run or walk cycles. There are a million of them. One for every boy and girl. Since every run and walk can be unique to every character its easy to get lost in those subtle details. I’ve found that sticking to a method and a science for approaching run and walk cycles is crucial.
Run and walk cycles are sneaky devils. I say that mainly because the entire body is connected during these types of locomotion. Every part of the body is in motion. A locomotion ecosystem, if you will. One limb is pushing an arm while the other is pulling a leg. It’s a beautiful, chaotic, and tricky motion to pull off in animation. If you adjust one thing, it effects another limb down the chain and so on.
Since there are a lot of ways to animate a motion, you want to do a bit of homework before you start. This is my first attempt at finding what kind of characteristics I’m going to attempt to bring to life in this run or walk. Who is this character? What are they running or walking from or to? Are they late? Are they fearful? Is she just strolling along on her way to an adventure?
Once I’ve got my back story, I start with the contact pose. To me, this is one of the most important key frames to figure out at the start. Honestly I think this pose takes me the longest to nail down. I put a lot of pressure on this pose.
When we get this pose nailed down I move forward to blocking in the first pass of her center of gravity’s momentum. This is laying in the ground work for your run or walk’s speed and overall timing. We put in the up and down translation in on this step.
Cog Translations & Hip Rotations
Here is my initial first pass at laying in some center of gravity translation and hip rotation to our Mage. I’m focusing in on how fast or slow I want my up and down movement for this cycle.
At the start of this animation I wanted a more purposeful jog as if she were on her way to deliver a quest she had just completed. I knew I didn’t want a full out Olympic sprint or a frantic scramble to get away from a terrible monster…though…that’s a good one I’ll have to come back to that. Once I’ve come to a good place with my center of gravity translation, I move outward onto the hips. Everything derives from the CoG and moves outward.
One of the common mistakes I see during this step is not animating all three axis for the translation of the CoG and the rotation of the hips. From what I’ve seen it’s mainly the X translation and the Y hip rotation. Having your CoG shift over each foot (ever so slightly in a run), and making sure those hips are reaching out with the legs, make or brake a believable run or walk.
The Layered Approach
When the CoG and the hips are working at the speed and spacing that we want, it’s time to continue our way outward to the Mage’s other body parts. We’ve got a pass on the core section, so we move onto her chest, legs, and arms. Moving outward from the CoG and hips. Since all of the motion is being driven from her core we want to layer the rest of her body parts on top of that movement Layering animation onto your center of gravity is what’s known as a “layered approach”.
It doesn’t even have to be started with the CoG. Depending on the animation you’re working on, you can start with the head and then layer your animation outward from the head, etc. I choose to layer all of the animation on top of our CoG and hip animation in this case. This is the method I tend to go with to help me break down how the rest of the body moves.
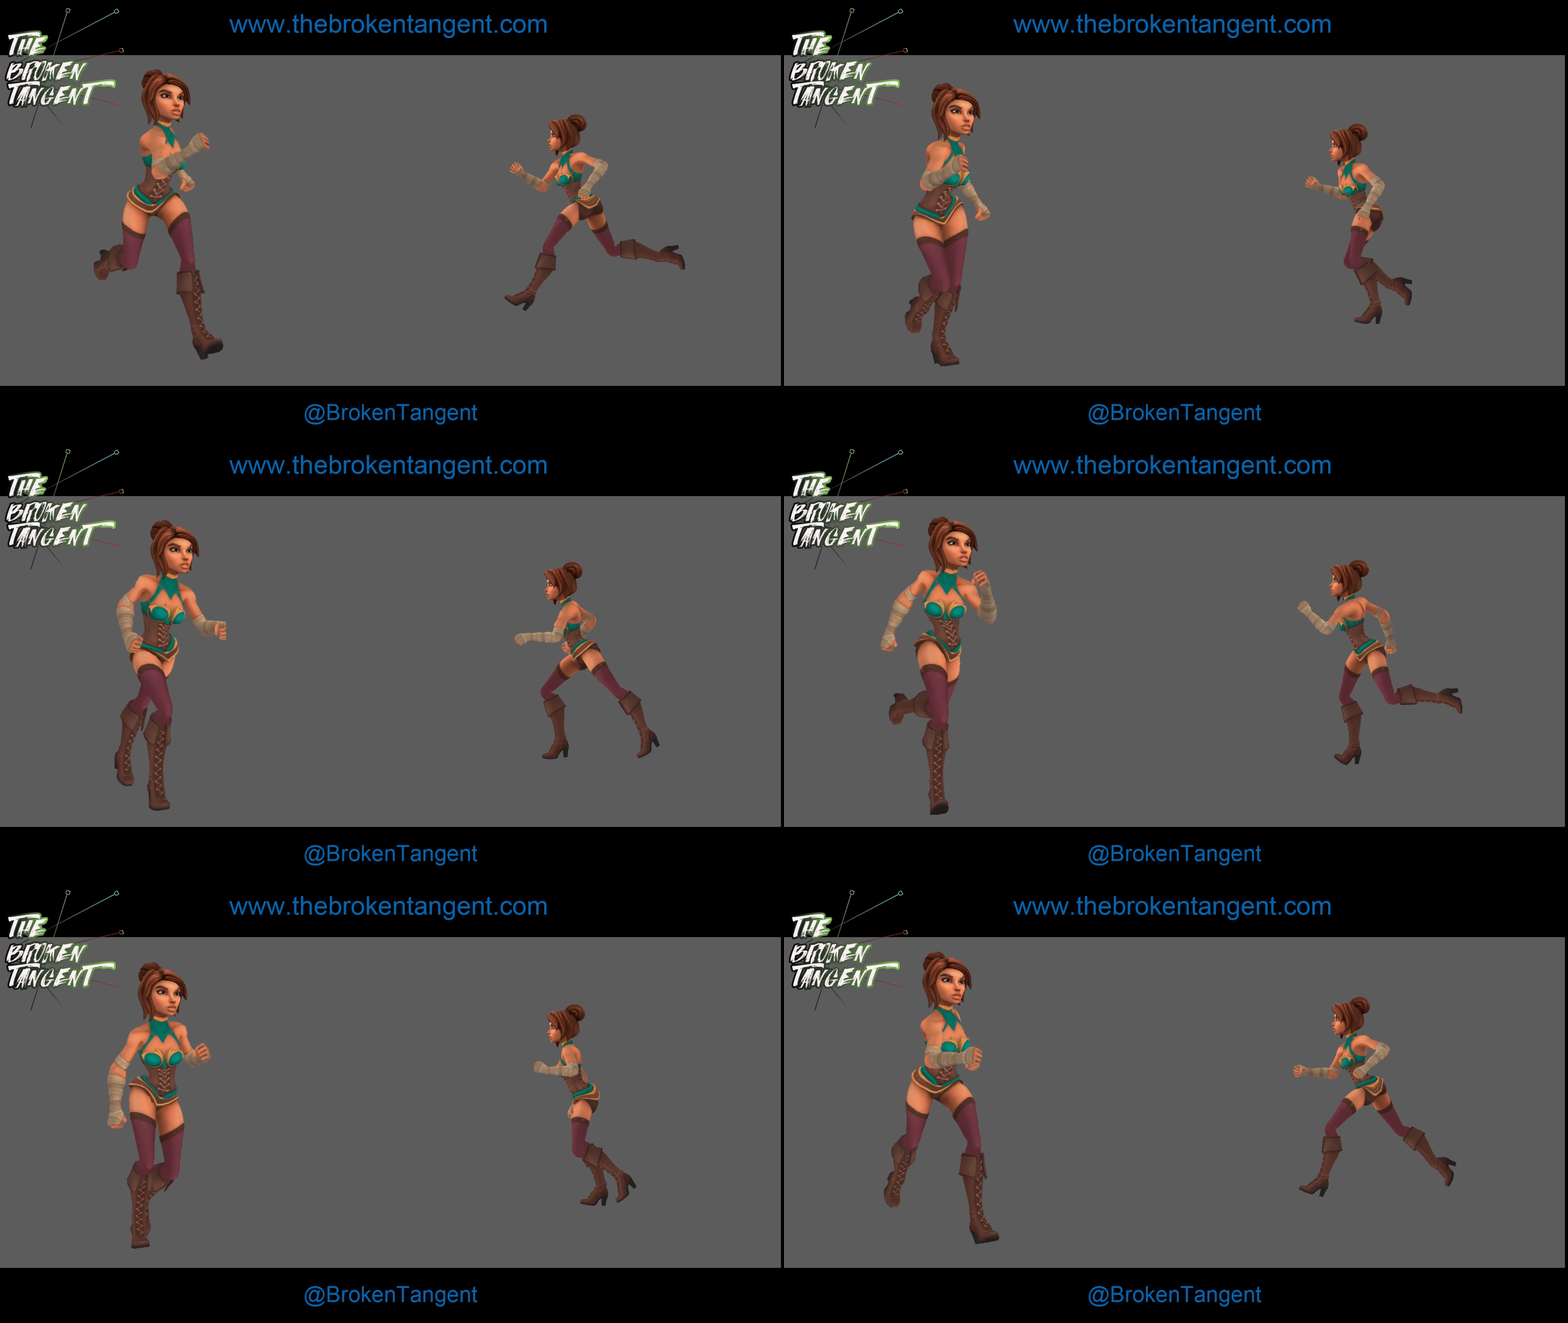
Below you’ll find my first initial pass on her arms, chest, and legs:
Lots of work to put in still but we’re starting to see how things are working together. The neck and the head have zero keys on them right now so they are super stiff. Along with how robotic the thighs look when in motion with the hip rotations. This is where we go back and start locking down our arms, chest, and legs. Adding in another layer of polish to show the locomotion.
Below is the next layer of animation where I’ve given more attention to those three body parts. Plus added a pass on her neck and head:
Now that we’ve got every major body part animated and in motion, this is the point where we take a step back and use our Director’s Eye to see where we need to refine things. At first glance: there are some spots where the arms are not looping properly. There are some frames where her legs are stretching, which causes her knees to pop. Her expression isn’t really isn’t sitting right with me so I feel we can make it better.
This is also the point where I realize… I haven’t even touched the Mage’s cape, cloak, cowl thingy, dagger, potion bottles, scarfffffffffffffffffffffffff
Sorry.
I blacked out there for a second.
The Life Is Found Within The Details
Look, I don’t care if you’re a traditional animator or a computer animator: Animation is a beautiful art form. It encompasses the major emotions, to the minor, and everything in between. In other words, it takes a lot of details and love to make these characters come to life through your keyboard and mouse...or tablet and pen.
In my ten years of animation experience I’ve come to find that most of these details come in the form of: clothes, face, hair, lip sync, and environmental/physical props. In the case of the Mage, it comes in the form of: clothes, face, hair, and props. I didn’t want to add any more complexity to this animation with having her interact with an object in the scene. This was my first real animation with this rig so my main goal was just to see what the limitations were. How far can this rig go on a run?
Below is my first attempt at playing with some of the cloth, and the potions on her belt. I choose to go with a very small piece to start. Just to get a feel for the timing and how heavy I want her clothes and glass potion bottles to look and feel:
I don’t think the potion bottles have enough weight here. They’re jiggling around too easily. The cloth, on the other hand, feels like a place I want to stay in as far as the look, feel, and the weight of her clothes.
Staying with the layered approach, my thinking here was to animate the cloth closest to her COG and hips first. Then work my way out from there. Now the tricky thing with cloth is to make the brakes in the folds of cloth look natural. You can’t push it too far or the mesh that the cloth is made out of breaks and stretches. You can’t go too little or else it’s going to look stiff and lifeless.
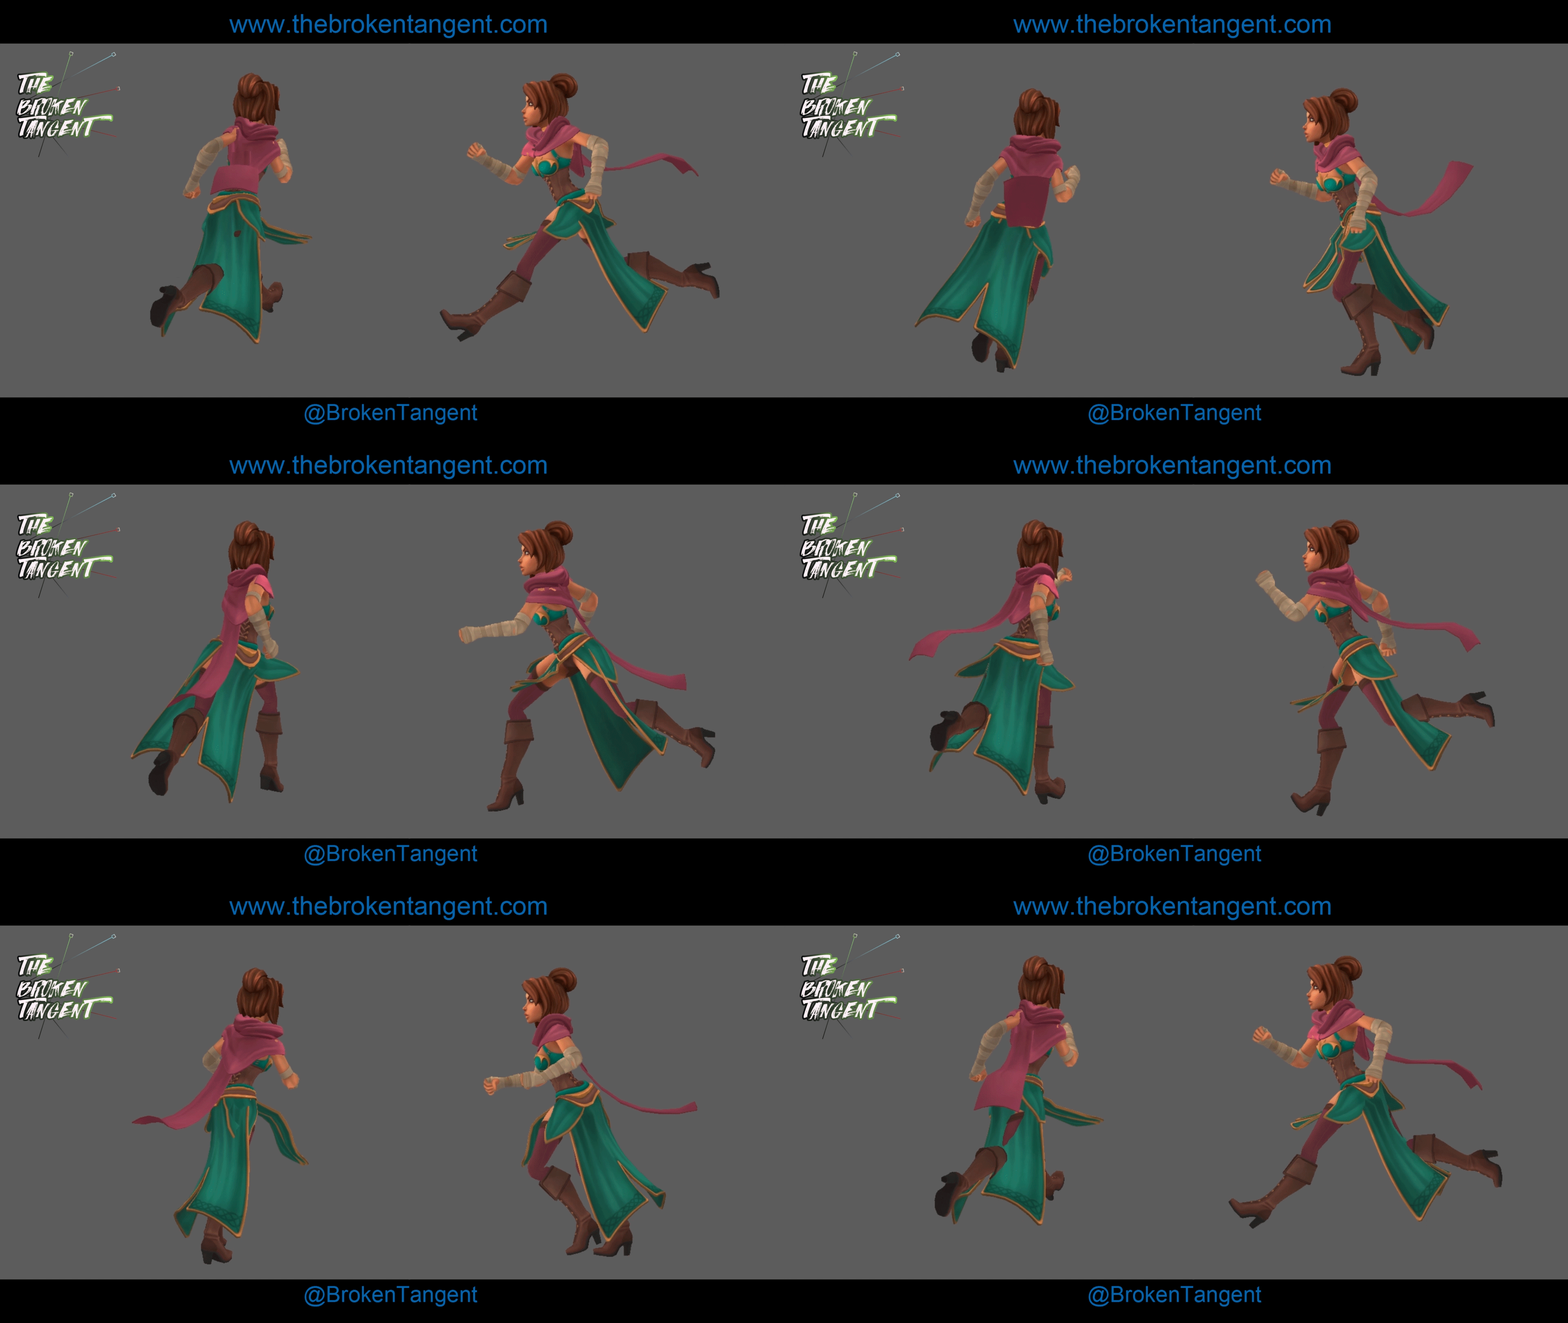
Here is my next pass where I dove into her front skirt and one of her larger pieces of the cloth: the pink cape:
I really wanted to get that nice whip/snap at the end of the cloak to give it some character. Trying to mimic that drag she’s getting with this long piece of cloth flowing in the wind behind her. I don’t think I’ve quite hit that mark yet in this version. The flap up and down timing doesn’t look correct to me. It’s almost independent of her CoG translations. This particular cape’s motion should start from and flow outward to the end of the cloth. Picture yourself holding one end of a long skinny sheet really tight, and then lifting it up and bringing it down in at this run cycle’s pace.
Back to the cloth drawing board. I continue to refine the timing and weight of these cloaks and scarfs. On top of this, I start laying in my timing and spacing for her accessories. Specifically, her potion bottles on her belt.
Here is a close up of those bottles along with more adjustments to the cloth overall:
Also take note of how we tried to maintain arcs and circles in other accessories like through the tip of her staff. Her dagger was counter animated to her motion to account for clipping issues. The largest obstacle I find with cloth is clipping and or intersecting with other pieces of the character. When the cloth is layered, like our Mage’s cloth is, there has to be some care taken to try avoid clipping where you can. A lot of stepping through keys and paying attention to detail.
In Conclusion
In the end there are, what feels like, a million tiny details to this run cycle. Because of this, I think the layered approach for these types of loops help me keep all of those details in check.
Think as simple as you can at the start. Save the details for the end once you’ve nailed the core body mechanics.
Remember, body mechanics are key. Everything else is layered on.


